


The Easter Craft Box
Let’s get crafty!
Make an Easter Wreath

Cut your chosen colours of tissue paper into squares from 0.5-2cm. The larger the squares, the fluffier the wreath will be.

Cover an area of the wreath in glue. Use the end of a pencil to place the tissue paper squares on the glue, holding up the edges to give it a 'fluffy' look.

Continue using the end of a pencil to place the tissue paper squares on the wreath. Place them close together to avoid gaps.


Easter Tree
Making an Easter tree need not be expensive! Your local park has everything you need!

Visit your back garden or local park. Collect long sticks, preferably with smaller twigs emerging from them, to hang decorations on.

Decorate the wooden eggs, scratch art egg and fuzzy art decoration in your box.

Arrange the sticks in a vase. Hang your egg decorations on them.
Origami Easter Basket
Origami is the art of folding paper, popular in Japanese culture. There are 2 pieces of origami paper in your Easter box, to make your very own Easter baskets. Some parts of this are tricky - there is a video tutorial below.

Fold a large triangle in your paper square, leaving a section at the sides around 1cm thick.

Cut off the white strips at the edges. One of these will be used for the handle of the basket. The other can be kept to decorate your wooden eggs or cards.

Fold the paper inwards diagonally. The pattern should be on the inside.

Open out paper revealing the folded line.

Turn the page and fold a diagonal line in the opposite direction.
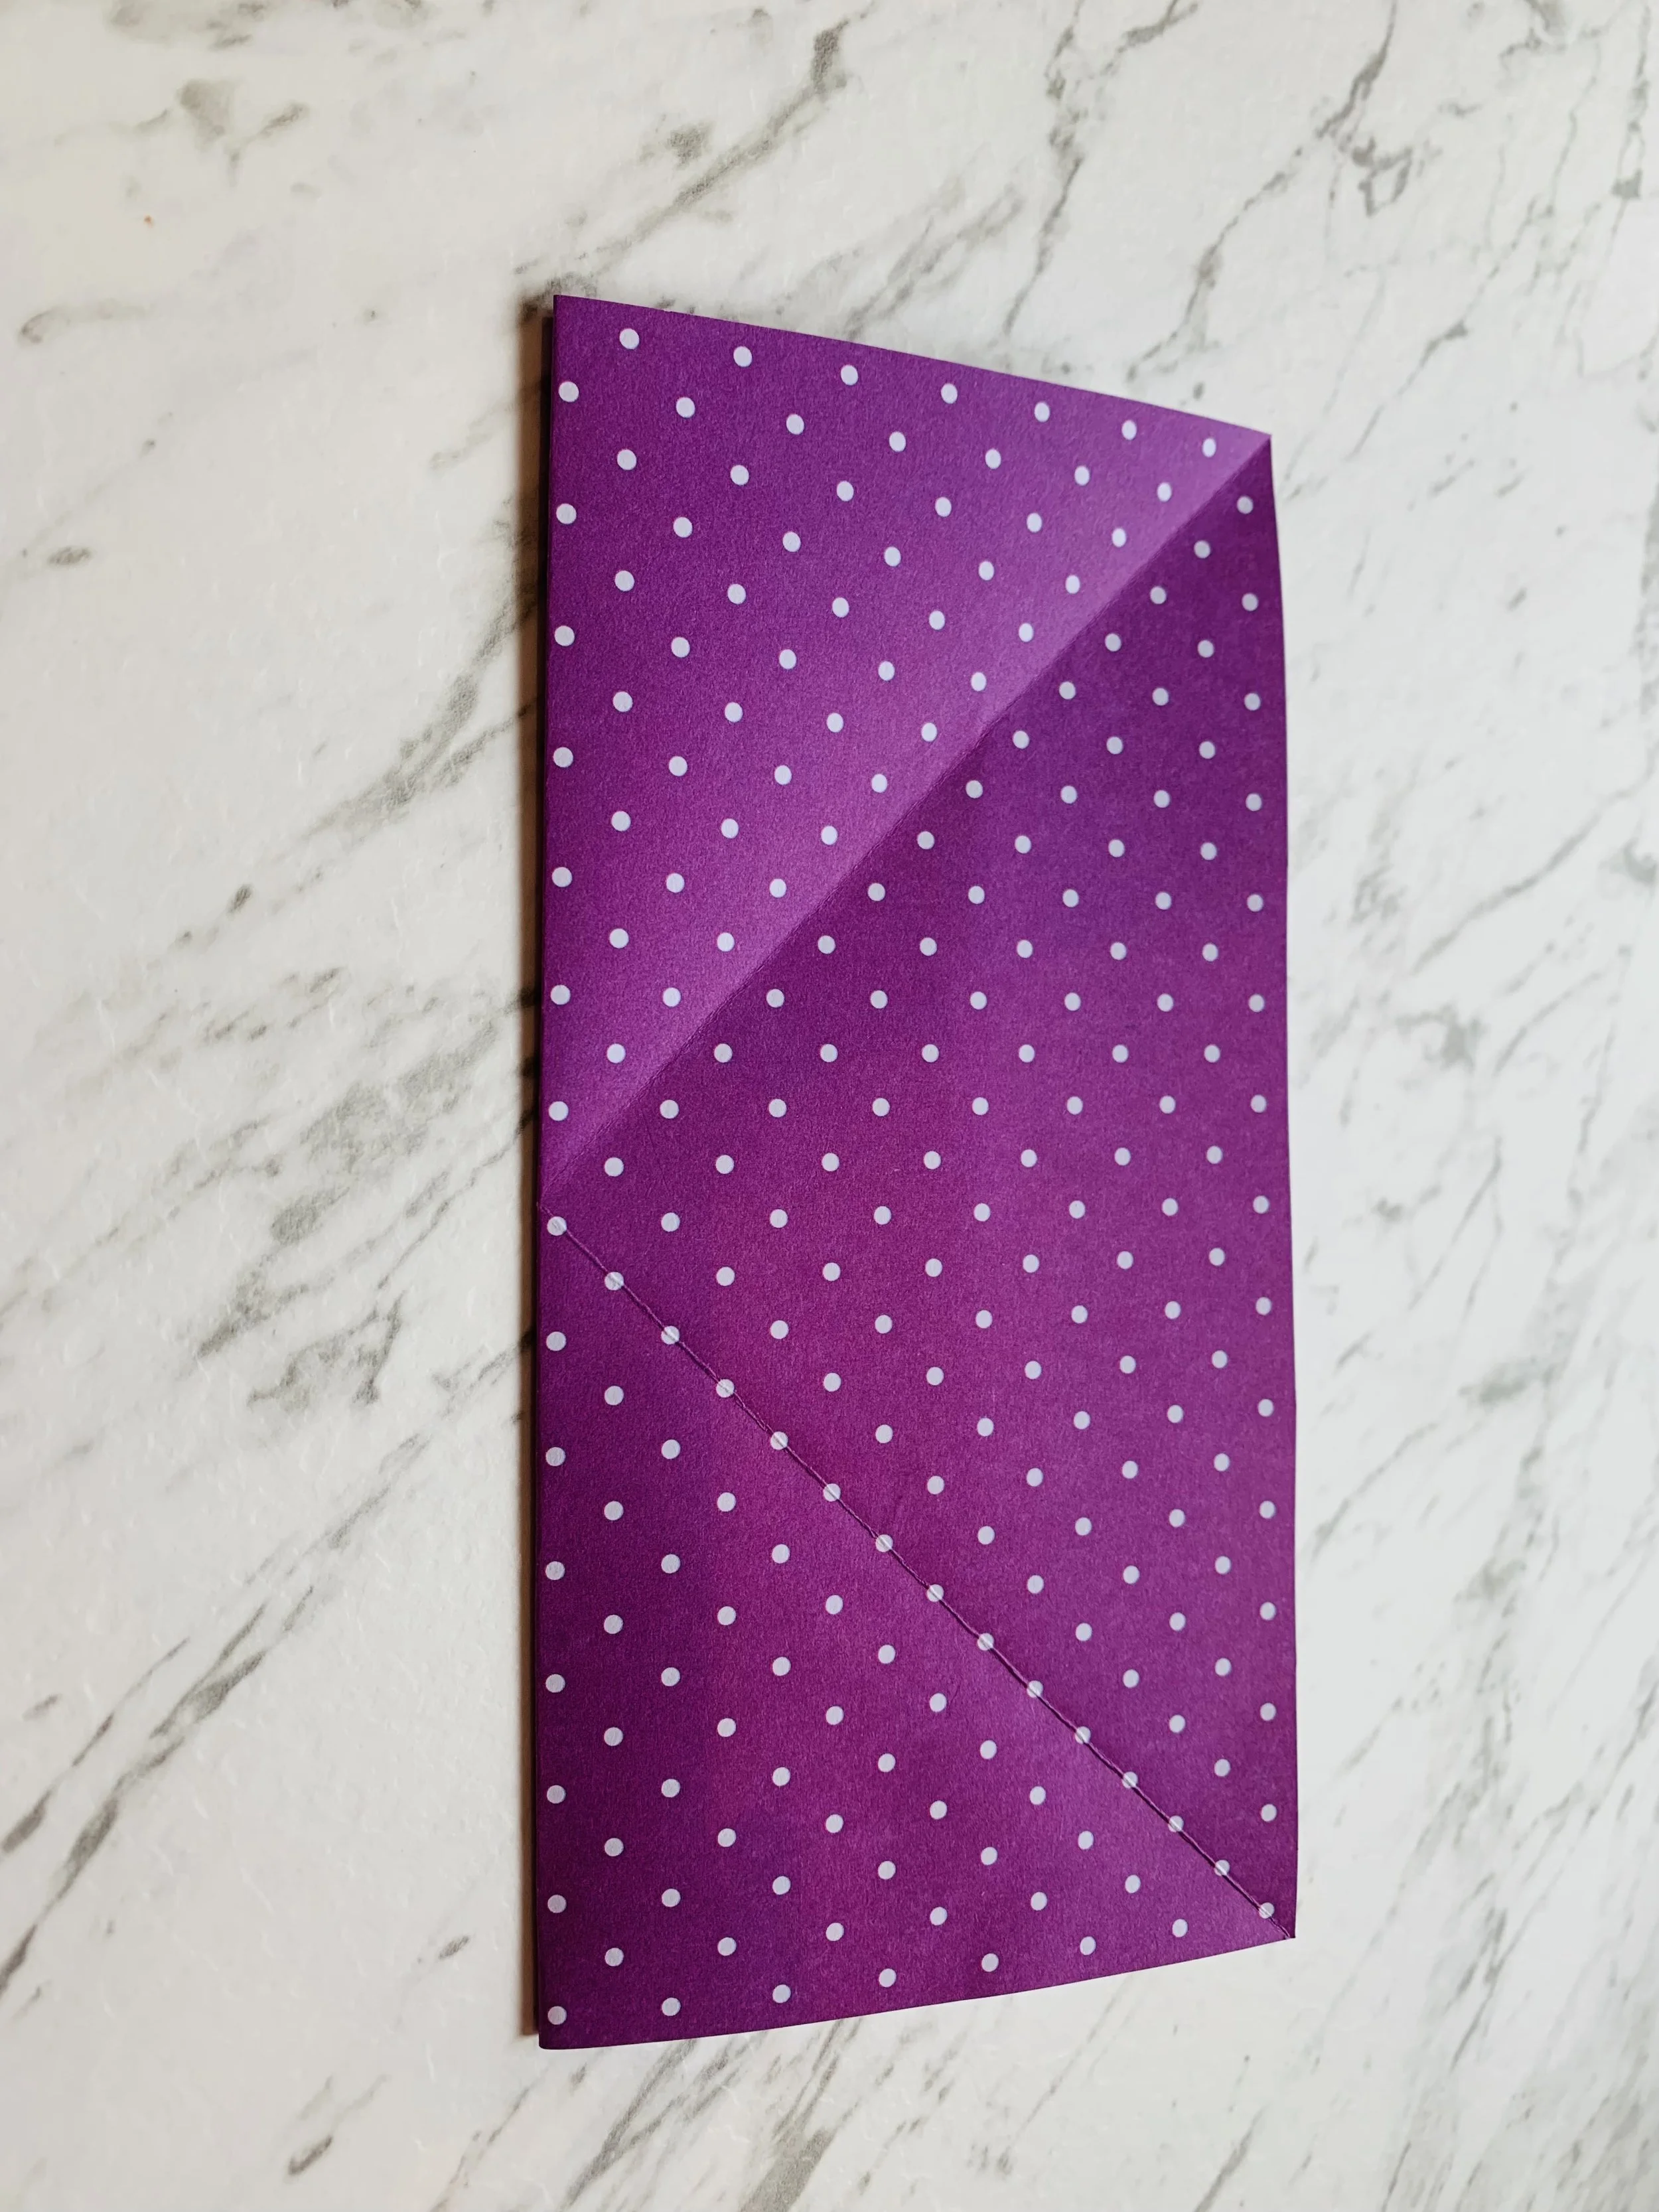
Fold the paper in half vertically. The pattern should be on the outside of the paper.

Open out the paper.

Repeat this, folding horizontally.

Open out the paper to reveal the horizontal, vertical and diagonal folded lines.

Bring together opposite corners. Watch the video below if you are unsure how this works.

Fold into a square.

Locate the corner at the open end. Fold down to the opposite corner.

Fold up from the bottom to the horizontal line.

Insert the piece of paper which you have kept for the handle.

Fold up to secure the handle in place.

Fold the outer corners into the middle of the handle.

Tuck the corners behind.

Turn over and repeat, folding the corners behind.

Open out the sides.

Fold down the sides.


Tuck the sides into the basket.

Decorate with tissue paper. Add Easter eggs, chicks or any other treat of your choosing.
Make your own Easter origami basket with these easy to follow instructions.
Easter Chick Box

Find the Easter chick box template.

Fold the sides as shown. The square will become the base.

Glue the tabs.

Fold up the sides to stick to the tabs.

Press out the cut outs for the wings and beak.

Add eyes and colour on the beak.

Decorate!
Other craft boxes you might like…

Craft Box - Minibeasts

Craft Box - Lots of Love

Craft Box - Space